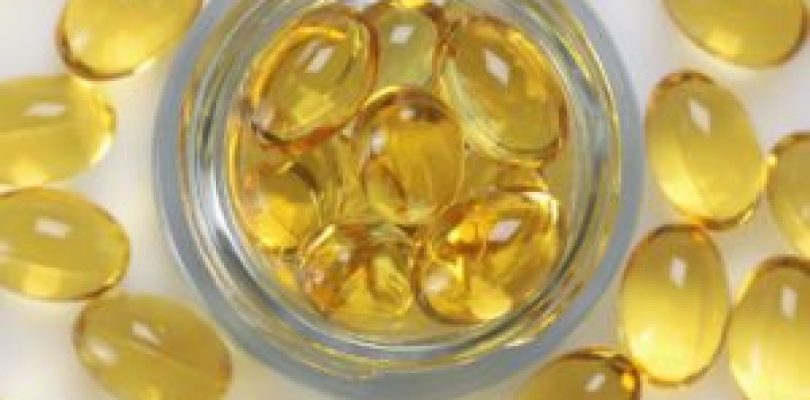
 Are you looking for an effective and efficient way to orally dose your cannabinoids in a manner which will be free of unwanted calories and unnecessary ingredients? Well, cannabis capsules may just be your answer. Canna caps, as they are often referred to, have become a staple across the cannabis industry as they offer a safe and effective oral delivery method that can be easily dosed and optimally metabolized. Most dispensaries carry some variation of the canna cap, and depending on where you purchase them, they may differ in their potency and ingredients.
Cannabis-infused capsules are also a perfect DIY project for anybody looking for a safe, inexpensive, and relatively simple at-home infusion. The required materials can be procured inexpensively, either online or at your local health food and/or drug store. This at-home project takes just a few hours and can be accomplished several different ways, depending on what ingredients and equipment are available to you.
Our recipe utilizes an infusion derived from coconut oil and soy lecithin. Combined, these two act as a terrific metabolizing agent for the cannabinoids as they pass through our digestive systems, enabling us to get more bang for our buck when dosing orally.
Keep in mind that dosing will vary considerably depending on a number of factors, such as the potency of your starting material and the ratio of the ingredients used. There is no standard ratio, but you can use our ratio(s) as a rough guideline and experiment to find what is right for you. The only way to fully know how potent your capsules are is to take them to a lab for testing, so don’t be afraid to use this option if it is available to you.
Ingredients and Materials Required for Cannabis Capsules
- 7-14 grams of cannabis (ground flowers are preferred for this recipe, though you can use kief and/or ground trim if you desire)
- 1/4 – 1/2 cup of organic extra virgin coconut oil
- 1/2 tsp soy lecithin
- Oven or slow cooker
- 45 to 50 empty gelatin capsules (preferably size 00)
- Capsule Filling machine
- Syringe: 10mm oral irrigators with tapered deep reach tips
- 1 cooking pot with lid
- 1 glass bowl
- 1 baking tray
- 1 sheet of parchment paper
- 1 piece of cheese cloth
- 1 small bowl
- 1 rubber band
- 1 spatula
Instructions
STEP 1: DECARBOXYLATION
 Preheat your oven to 220 degrees Fahrenheit and prepare your material by grinding it finely with your grinder and spreading the grounds across a sheet of parchment paper that has been placed over a baking tray. Ovens tend to fluctuate in temperature, so it’s important to note that you do not want the oven hotter than 250 degrees. Any hotter and you begin to risk cooking off valuable cannabinoids. The material will need to bake for about 30-45 minutes before you can achieve a proper decarboxylation, though you can continue this process for longer if you prefer. Once finished, pull the tray from the oven and proceed to step 2.
If you plan on using your oven for the remainder of the process, keep the temperature at 220 degrees.
STEP 2: INFUSION
1. OVEN- Begin by filling your cooking pot 3/4 of the way full with water and bringing it to a soft boil. Add your coconut oil and soy lecithin to your glass cooking bowl and place it within the rim of your cooking pot so that the bowl sits about 1-2 inches above the soft boiling water. After several minutes, your coconut oil and soy lecithin will melt down and you can add your finely ground and decarboxylated cannabis. Mix the material together until everything is homogenous. Empty the hot water out of your cooking pot and then add the oil mixture. Place the pot back in the oven (still at 220 degrees) for an additional 30-45 minutes. Check in a few times to stir, if necessary. You may cook the mix for longer if desired. This may affect the potency of your end product because it will allow for a further degradation of THC to CBN, a conversion known to add a more sedating effect to your finished capsule.
2.SLOW COOKER- Add your decarboxylated starting material, coconut oil, and soy lecithin to your slow cooker and turn the unit to LOW HEAT. Allow the material to cook for 2 hours (longer if desired) to achieve as proper decarboxylation, stirring several times per hour. Slow cookers tend to cook around 200 degrees on the low setting, so make sure you check beforehand to get a better estimate of how much time you will need.
STEP 3: FILLING CAPS
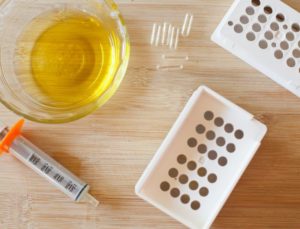 While your oil is finishing in the oven, prepare the size 00 empty gelatin capsules and capsule filling machine by following the instructions on the package. These devices are designed to make capsule filling a much easier, more streamlined process, though the machine is not required — you can always poke some holes in a cardboard box with a pen to help hold the capsules in place while you fill them. (In my opinion, the small amount you will pay for the machine is worth the convenience.)
Now take your cheese cloth and secure it over the rim of your small bowl using the rubber band. When the oil is finally finished, remove it from the oven and strain the oil through your cheese cloth and into the small bowl, catching the unnecessary particulates along the way. Afterwards, be sure to let the oil cool to a temperature less than 100 degrees Fahrenheit before proceeding with filling your syringe. Gelatin capsules tend to melt over 100 degrees, so make sure that your oil is as cool as you can get it before letting it solidify.
Once the oil has cooled to your desired temperature, it’s time to fill the syringe. Do so by following your syringe’s instructions, and make sure the oil remains warm enough to stay liquid. Use the syringe’s tapered deep reach tip to feed the oil into the gelatin capsules, one at a time, until you run out of oil; repeat this process accordingly. Once finished, use the instructions on your filling machine to close each capsule. During this process, you may find that you have over filled a few caps. Use a hand towels or tissue to wipe the remaining residue. The finished caps can be store in a cool, dark place (like a refrigerator) until you are ready to use them. If done properly, this recipe will produce around 45-50 capsules (this amount is only an estimate and will depend on the ratios of starting material and oil you used).
DOSING:
Dosing will depend on 3 variables:
- Potency of starting material
- Ratio of oil to starting material
- Decarboxylation
The easiest and most accurate way to test the strength of your caps is to take them to a lab for testing. If you’re looking for a rough estimate of how strong your caps are, take the potency of your starting material and convert it to milligrams. Once you have this figure, divide it by the net weight of your final yield and shave off 10% or so to account for decarboxylation. This should land you in the ball park of how potent your whole batch will be. Take this figure and divide it once more by the number of capsules you filled and that will leave you will an estimate to work with.